Skip to content

Table Of content
Crispy Chicken Parmesan Restaurant Style: Your Weeknight Italian Dinner Hero
If you dream of that perfectly golden, shatteringly crisp **Crispy Chicken Parmesan Restaurant Style** but think it takes forever, I’m here to tell you that’s just not true! I’m Anna, and I’m a passionate food lover who specializes in sharing simple and flavorful chicken recipes to make everyday cooking easier and more joyful.
I’ve spent years perfecting the breading technique, so I know exactly what makes that crust stay crunchy even under melted cheese. Forget soggy dinners! We’re locking in flavor and texture with simple steps that deliver authentic Italian-American comfort right to your table tonight.

Why You’ll Love This Crispy Chicken Parmesan Restaurant Style
This isn’t just another chicken dinner; it’s the one your family asks for again and again. We cut out all the complicated steps without sacrificing that amazing, satisfying crunch you usually only get at your favorite Italian spot.
- Quick Prep Time: You can have this ready for the oven in under 30 minutes, even with pounding the chicken!
- Authentic Texture: That golden, crisp coating holds up beautifully to the sauce and cheese.
- Family Approval Guaranteed: It’s the ultimate comfort food that tastes homemade but feels gourmet.
Key Benefits for Busy Cooks
We are aiming for maximum flavor with minimum fuss here. Since the frying time is so fast, you get that deep-fried taste without standing over the stove forever. Plus, the whole process—from prep to table—is done in under 45 minutes, making it perfect for a busy Tuesday night when you still want something special.
Essential Ingredients for Perfect Crispy Chicken Parmesan Restaurant Style
Okay, let’s talk about what goes into making this **Crispy Chicken Parmesan Restaurant Style** truly shine. You don’t need fancy imported items for this, but you do need to respect the quality of what you use. When you’re frying something, especially chicken, the basic ingredients really have to pull their weight!
I always keep these staples stocked because they are the foundation for incredible texture and flavor. Don’t skimp on the cheese, trust me on that one!
Preparing the Chicken
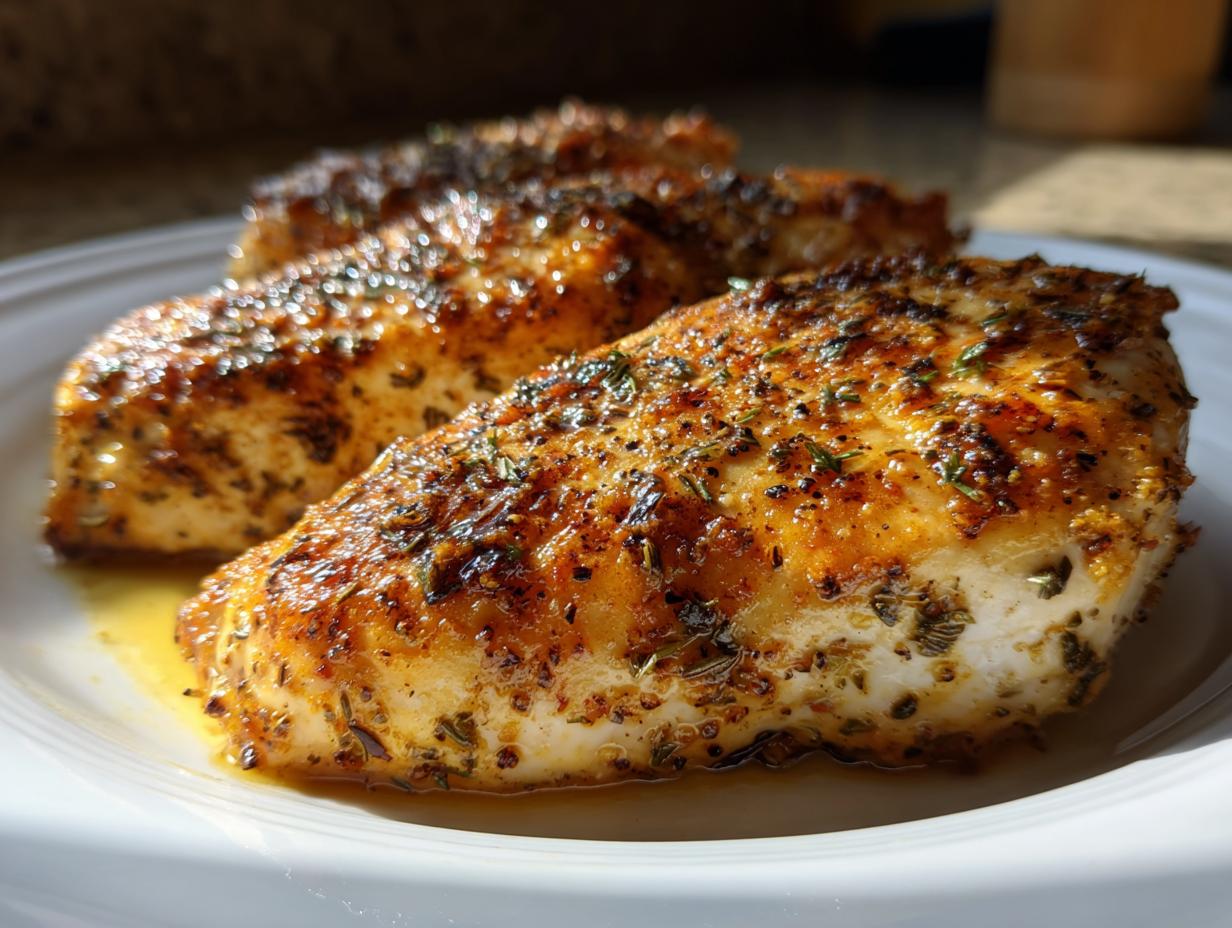
We need four nice, even cutlets for this recipe, which means starting with those 1 1/2 pounds of boneless, skinless chicken breasts. The biggest secret to even cooking and a great crust is the thickness. You absolutely must butterfly them first, then pound them gently until they are all uniformly about half an inch thick. This ensures everything cooks through at the same rate!
Building the Flavorful Breading Station
This is where the magic happens! You need three bowls set up. First, simple flour seasoned with salt and pepper. Second, your egg wash—I whisk two eggs with just a splash of milk; it helps the coating spread nicely. Third, the breadcrumbs. Use Italian style breadcrumbs, but here’s the trick: when you dip the chicken, you have to press that crumb mixture onto the meat firmly. Really adhere it!
Sauce and Cheese Selection
For the topping, skip the pre-shredded mozzarella in the bag; it just doesn’t melt right. Grab those nice, fresh mozzarella slices—they get gooey and perfect under the broiler. And please, freshly grate your Parmesan! That sharp, nutty flavor is miles better than the stuff in the shaker can. That fresh Parmesan is what gives you that authentic flavor boost.
Equipment Needed for Your Crispy Chicken Parmesan Restaurant Style
You don’t need a commercial kitchen to make amazing **Crispy Chicken Parmesan Restaurant Style**, but a few key tools make the job much easier. You’ll definitely want a heavy-bottomed skillet—cast iron is my favorite for holding that steady heat we need for frying.
- A reliable instant-read thermometer is non-negotiable for food safety!
- A sturdy baking sheet for the final broil.
- Shallow bowls for your breading station setup.

Step-by-Step Instructions for Crispy Chicken Parmesan Restaurant Style
Alright, let’s put this all together! Following these steps precisely is how we lock in that amazing crunch and get that beautiful golden color. This is the whole process for making your **Crispy Chicken Parmesan Restaurant Style** dinner from start to finish. Don’t rush the resting steps; they make a huge difference!
Seasoning and Breading Technique
First up, grab your pounded chicken cutlets. Season them really well on both sides with salt and pepper—don’t be shy! Now, set up your assembly line: flour in bowl one, egg wash (eggs and milk whisked) in bowl two, and those Italian breadcrumbs in bowl three. Dredge each piece through the flour first, shaking off the excess. Then dip it completely into the egg wash. Finally, press it firmly into the breadcrumbs until it’s totally coated. Remember that note from earlier? You have to press those breadcrumbs onto the meat for maximum adhesion!
Here’s a pro tip: Once they are breaded, let them sit on a clean plate or wire rack for about 10 minutes. This short rest lets that coating really set up, meaning it won’t fall off when it hits the hot oil.
Achieving Perfect Restaurant Style Frying
Time to fry! Heat about 1 inch of vegetable oil in your large skillet until it hits exactly 350°F. If you don’t have a thermometer, the oil is ready when a few breadcrumbs dropped in sizzle immediately but don’t burn instantly. Fry the chicken in batches—don’t crowd the pan, or the temperature will crash! Cook them for about 4 to 5 minutes on each side until they are deeply golden brown. Always check the thickest part with your thermometer; we need that internal temperature to hit 165°F to be safe. Once done, pull them out and let them drain briefly on paper towels.
The Final Broil and Rest
Now we add the Italian layers! Set your oven broiler to high. Place the fried chicken cutlets onto a baking sheet. Spoon your marinara sauce over the top of each piece. Sprinkle on that lovely grated Parmesan, and then place a slice of fresh mozzarella right on top of that. Slide it under the broiler for just 2 to 3 minutes. Watch it like a hawk! You want the cheese melted, bubbly, and just starting to brown. Once it looks perfect, pull it out, but don’t serve it right away! Let the chicken rest for 5 minutes before you cut into it. This lets the juices settle and keeps the crust from steaming itself soggy.
Tips for Achieving Ultimate Crispy Chicken Parmesan Restaurant Style
We all know the biggest enemy of breaded chicken is sogginess, especially once that lovely sauce and cheese go on top! If you follow the frying instructions exactly, you’ll drastically reduce that risk, but I have a couple more tricks up my sleeve to make sure your **Crispy Chicken Parmesan Restaurant Style** stays crunchy until the very last bite.
Oil Temperature Management
This is crucial, seriously. If your oil isn’t hot enough—below 350°F—the chicken soaks up oil like a sponge instead of frying quickly. That makes the crust heavy and greasy, not crisp. If it’s too hot, it burns before the inside cooks. Keep that thermometer handy! Consistent heat is the secret handshake for crispy food.
Preventing a Soggy Bottom
After you pull the chicken out of the oil, drain it on paper towels, yes, but for the absolute best results, transfer it immediately to a wire cooling rack set over a baking sheet for just a minute or two before you sauce it. This lets air circulate underneath, preventing steam from building up and softening that beautiful bottom crust while you top it for the broiler.
Frequently Asked Questions About Crispy Chicken Parmesan Restaurant Style
I get so many questions about making this dinner perfectly at home, especially about keeping that crunch! If you’re worried about the frying part or the sauce, don’t stress; we can troubleshoot anything to make your **Crispy Chicken Parmesan Restaurant Style** a huge success.
Can I Bake Instead of Frying for Crispy Chicken Parmesan Restaurant Style?
You absolutely can bake it, and it will still be delicious comfort food! However, if you are aiming for that true, shatteringly crisp texture that defines **Crispy Chicken Parmesan Restaurant Style**, frying is necessary. Baking tends to give you a drier crust that can sometimes get a little soft once the sauce is added. If you do bake, I recommend spraying the breaded chicken heavily with oil spray before baking it on a wire rack.
What Kind of Oil Works Best for Frying?
You need an oil that has a high smoke point so it doesn’t break down at 350°F. I stick with plain old vegetable oil because it’s cheap and works perfectly. Canola oil is another fantastic, neutral choice. Just avoid olive oil for deep frying; it burns too fast and changes the flavor in a way I don’t love for this dish.
Can I Make the Sauce Ahead of Time?
Yes, please do! Making your marinara sauce ahead of time is a huge time saver on a busy night. In fact, homemade sauces often taste even better the next day after the flavors have really married. Just store it airtight in the fridge and warm it up gently before you spoon it over the fried cutlets right before the broiler.
Storing and Reheating Your Leftover Crispy Chicken Parmesan Restaurant Style
It’s rare that we have leftovers because this dish disappears so fast, but when we do, keeping that crispy texture alive is the challenge! You want to store the components separately if you can, but if you already broiled it all together, follow these steps for the best chance at salvaging that crunch on your **Crispy Chicken Parmesan Restaurant Style** tomorrow!
Storage Guidelines
If you know you’ll have leftovers, try to store the leftover chicken separately from the sauce and cheese. But if it’s already assembled, just pop the whole thing into an airtight container. It keeps well in the fridge for about three days, though the crispiness fades after day one.
| Component | Storage Method | Duration |
|---|---|---|
| Fully Assembled | Airtight container in fridge | Up to 3 days |
| Unsauced Fried Chicken | Paper bag or loosely covered container | Up to 2 days |
Reheating for Maximum Crispness
Listen to me: Do not, under any circumstances, microwave your leftover chicken parmesan if you want it crispy! The microwave is the enemy of crunch. For the best results, pop the leftover pieces onto a wire rack set over a baking sheet and reheat them in a 375°F oven for about 10 minutes. Even better? Use your air fryer for 5 to 7 minutes. It brings back that glorious, restaurant-style crispiness!
If you want more inspiration for crispy chicken dishes, check out my collection of recipes on Pinterest!
Nutritional Estimate for This Recipe
Now, I know most of us aren’t counting every calorie when we sit down to a plate of cheesy, crispy perfection, but it’s good to have a general idea of what we’re digging into! Since this recipe yields four generous servings, these numbers are just estimates based on the ingredients listed.
Keep in mind that the final tally can swing based on how much oil your chicken absorbs during frying and the specific brands of sauce and cheese you choose. Here’s a rough breakdown of the typical values for one serving:
- Calories: Around 560
- Fat: About 26g
- Protein: A solid 44g
- Carbohydrates: Roughly 32g

Amazing 4 Crispy Chicken Parmesan Restaurant Style
- Total Time: 45 minutes
- Yield: 4 servings 1x
- Diet: None
Description
Crispy Chicken Parmesan Restaurant Style delivers a classic comfort dinner at home. You get golden breaded chicken, rich tomato sauce, and perfectly melted mozzarella for a satisfying meal.
Ingredients
- 1 1/2 pounds boneless skinless chicken breasts butterflied and pounded to 1/2 inch thickness
- 1 teaspoon salt
- 1/2 teaspoon black pepper
- 1 cup all purpose flour
- 2 large eggs
- 2 tablespoons milk
- 2 cups Italian style breadcrumbs
- Vegetable oil for frying
- 2 cups marinara sauce
- 8 ounces fresh mozzarella sliced
- 1/2 cup freshly grated Parmesan cheese
Instructions
- Season chicken breasts evenly on both sides with salt and black pepper.
- Set up a breading station: place flour in one shallow bowl, whisk eggs with milk in a second bowl, and put breadcrumbs in a third bowl.
- Dredge each chicken piece in flour, dip into the egg mixture, then press firmly into breadcrumbs until fully coated.
- Let the breaded chicken rest for 10 minutes; this helps the coating stick.
- Heat 1 inch of vegetable oil in a large skillet to 350°F.
- Fry chicken in batches for 4 to 5 minutes per side until golden brown and cooked through. Check that the chicken reaches an internal temperature of 165°F. Transfer fried chicken to a paper towel lined plate.
- Preheat your oven broiler to high. Place the fried chicken on a baking sheet.
- Spoon marinara sauce over each piece, sprinkle with Parmesan cheese, and top with mozzarella slices.
- Broil for 2 to 3 minutes until the cheese is melted and bubbly.
- Remove from the oven and let the chicken rest for 5 minutes before you serve it.
Notes
- Press the breadcrumbs firmly onto the chicken to ensure a crisp, even coating.
- Prep Time: 25 minutes
- Cook Time: 20 minutes
- Category: Main Course
- Method: Frying and Broiling
- Cuisine: Italian-American
Nutrition
- Serving Size: 1 serving
- Calories: 560
- Sugar: Unknown
- Sodium: Unknown
- Fat: 26g
- Saturated Fat: Unknown
- Unsaturated Fat: Unknown
- Trans Fat: Unknown
- Carbohydrates: 32g
- Fiber: Unknown
- Protein: 44g
- Cholesterol: Unknown