Skip to content
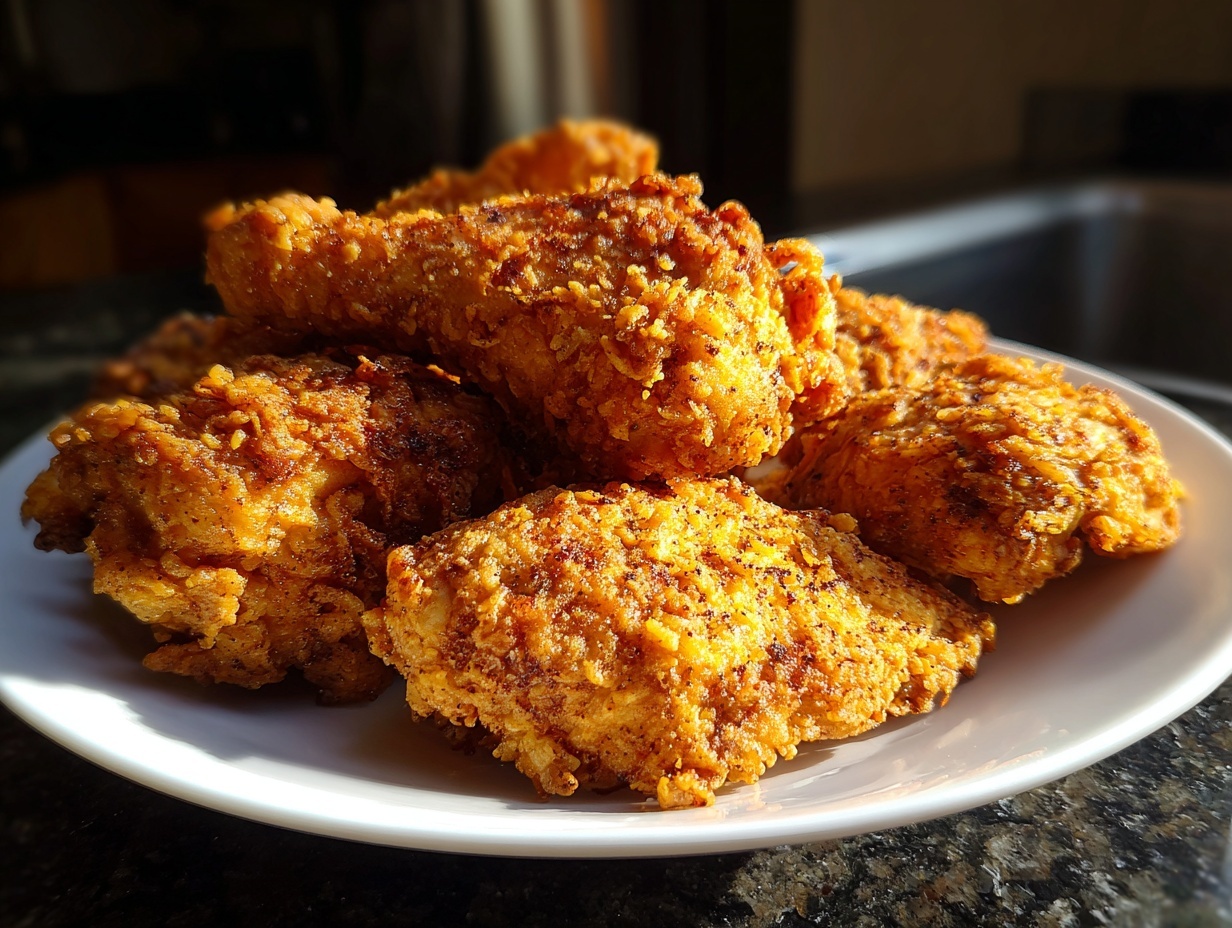
Oh, who doesn’t love a plate of perfectly golden, unbelievably crispy fried chicken? It’s the ultimate comfort food, right? I’m Anna, and I’m just a home cook who absolutely adores creating simple, flavorful chicken dishes that make everyday meals feel like a celebration. Today, we’re diving deep into making the most amazing Classic Crispy Buttermilk Fried Chicken. Forget dry, bland chicken – this recipe is all about that juicy, tender meat and a shatteringly crisp crust that will have everyone asking for seconds!

Table Of content
Why You’ll Love This Classic Crispy Buttermilk Fried Chicken
Seriously, if you’re looking for fried chicken perfection, you’ve found it! This recipe isn’t just about frying chicken; it’s about creating an experience. I’ve tinkered with this for ages, and trust me, it’s a winner. Here’s why this Classic Crispy Buttermilk Fried Chicken is going to become your go-to:
- Unbeatable Crispy Texture: That crunch? Oh yeah, it’s real! We achieve it with a special trick that makes every bite unbelievably satisfying.
- Incredibly Juicy and Tender Chicken: No one likes dry chicken! The secret weapon here is the buttermilk brine, which works wonders to keep the meat moist and tender.
- Simple Spice Blend for Big Flavor: We’re not going overboard, but this blend of spices just makes the chicken sing without overpowering its natural goodness. It’s a flavor party in every bite!
Unbeatable Crispy Texture
The magic is in the double coating! Dredging the chicken twice in seasoned flour creates those irresistible craggy bits that get super crunchy when fried. It’s a game-changer for that perfect crisp!
Incredibly Juicy and Tender Chicken
That buttermilk brine is the MVP here. It doesn’t just add flavor; it breaks down the chicken’s proteins, making it incredibly tender and juicy. Seriously, it locks in all the moisture!
Simple Spice Blend for Big Flavor
This isn’t about a million spices. It’s about a few key players – paprika, garlic, onion powder, salt, and pepper – that perfectly complement the chicken for that classic, delicious taste everyone loves.
Ingredients for Classic Crispy Buttermilk Fried Chicken
Alright, let’s get down to what you’ll need for this masterpiece! Getting the ingredients right is half the battle, and trust me, these are the ones that make all the difference for that perfect Classic Crispy Buttermilk Fried Chicken.
Chicken Selection and Preparation
You’ll need about 3 to 4 pounds of bone-in, skin-on chicken thighs and drumsticks. I love using a mix because the dark meat stays so wonderfully juicy. Make sure the skin is on – that’s key for all that crispy goodness!
The Essential Buttermilk Brine
For the brine, grab 2 cups of buttermilk. This is where the magic starts! We’ll also need 1 teaspoon of salt to add a little extra flavor to the marinade. Don’t skip the salt in the brine; it really helps season the chicken from the inside out.
Flavorful Flour Coating
For that crunchy coating, you’ll need 2 cups of all-purpose flour. Then, we’ll mix in our flavor boosters: 1 tablespoon of paprika for color and a subtle sweetness, 1 teaspoon each of garlic powder and onion powder for that savory punch, 1 teaspoon of salt, and 1/2 teaspoon of black pepper. If you like a little heat, feel free to add a pinch of cayenne pepper or even a dash of hot sauce to the flour mixture!
For Deep Frying
And of course, we need oil for frying! You’ll want about 3-4 cups of vegetable oil, or enough to fill your skillet or fryer about 2-3 inches deep.
How to Prepare Classic Crispy Buttermilk Fried Chicken
Okay, deep breaths! Making this amazing fried chicken is totally doable, and I’ll walk you through every single step. It’s all about a little patience and following these simple instructions for that perfect Classic Crispy Buttermilk Fried Chicken.
Marinating the Chicken
First things first, let’s get that chicken soaking! In a big bowl or a sturdy zip-top bag, combine your 2 cups of buttermilk with 1 teaspoon of salt and any optional spices you’re using. Toss in your chicken pieces, make sure they’re all coated, and then cover it up. Pop it in the fridge for at least 4 hours, but honestly, overnight is even better if you can manage it. This is where all that tenderness and flavor really sinks in!
Preparing the Flour Dredge
While your chicken is getting all happy in its buttermilk bath, let’s get the coating ready. Grab a big bowl or a shallow pan and dump in your 2 cups of all-purpose flour. Now, whisk in all those yummy spices: the paprika, garlic powder, onion powder, 1 teaspoon of salt, and black pepper. Give it a good mix so everything is evenly distributed. This is your golden ticket to a crunchy crust!
The Double Coating Technique for Extra Crispiness
This is the secret sauce for that super-duper crispy crust, trust me! Take your chicken out of the buttermilk, letting any excess drip off for a second. Don’t wipe it dry! Now, dredge each piece thoroughly in the seasoned flour, pressing gently to make sure it sticks. Shake off any loose flour. For that extra crunch, dip the floured chicken *briefly* back into the buttermilk – just a quick dip! Then, immediately dredge it again in the seasoned flour, pressing firmly. This double coating is what creates all those amazing craggy bits that get so wonderfully crisp when fried.
Deep Frying to Golden Perfection
Time to get frying! Pour your vegetable oil into a heavy-bottomed skillet or a deep fryer, making sure you have about 2-3 inches of oil. Heat it up over medium-high heat until it reaches 350°F (175°C). A good thermometer is your best friend here! Carefully, and I mean *carefully*, lower your coated chicken pieces into the hot oil. Don’t crowd the pan – fry in batches if you need to! Too much chicken at once will drop the oil temperature and make it greasy. Fry for about 12-15 minutes, turning the pieces occasionally with tongs, until they’re a gorgeous golden brown and cooked through. You’re looking for an internal temperature of 165°F (74°C) in the thickest part of the chicken, avoiding the bone.
Resting for Juiciness
Almost there! Once your chicken is perfectly golden and cooked, carefully remove it from the hot oil. Place the pieces on a wire rack set over a baking sheet. This is super important – letting it rest for at least 5-10 minutes allows the juices to redistribute throughout the meat. If you cut into it too soon, all that delicious moisture will run out! Resting ensures every bite is as juicy and tender as the first.
Tips for the Best Classic Crispy Buttermilk Fried Chicken
Okay, so you’ve followed the steps, and now you want to make sure your Classic Crispy Buttermilk Fried Chicken is absolutely perfect every single time. I’ve learned a few tricks along the way that make a huge difference, and I’m happy to share them!
Maintaining Consistent Oil Temperature
This is probably the *most* important tip for super crispy fried chicken. Keep that oil right around 350°F (175°C)! If it’s too low, your chicken gets greasy. If it’s too high, the outside burns before the inside cooks. A good thermometer is your best friend here, just keep an eye on it!
Achieving the Perfect Double Coating
When you’re doing that double dredge, don’t be shy about shaking off the excess flour after each coating. You want a nice, even layer that sticks well, but too much loose flour can actually burn and leave a pasty texture instead of a super crisp crust. Press it on gently, then shake off the loose bits.
Draining and Resting Properly
Resist the urge to pile your beautiful fried chicken onto paper towels! While it might seem like a good idea, it traps steam and can make the bottom crust a little soggy. A wire rack lets the air circulate all around, keeping every side wonderfully crisp. And don’t skip that resting time – it really does make the chicken so much juicier!
Frequently Asked Questions About Classic Crispy Buttermilk Fried Chicken
Got questions about making the best Classic Crispy Buttermilk Fried Chicken? I get it! Fried chicken can seem a little intimidating, but honestly, it’s totally manageable. Here are a few things folks often ask.
Can I use chicken breast for this Classic Crispy Buttermilk Fried Chicken recipe?
You sure can, but you’ll need to adjust the cooking time! Chicken breasts cook faster than thighs and drumsticks, and they can dry out more easily. Keep a close eye on them and pull them out as soon as they reach that 165°F internal temperature to keep them nice and juicy.
How do I prevent my Classic Crispy Buttermilk Fried Chicken from becoming soggy?
The biggest culprits for soggy chicken are overcrowding the pan and not letting it drain properly. Always fry in batches so the oil temperature stays up, and definitely use a wire rack to drain. It lets the air circulate, keeping that glorious crust crisp. Serve it right away for the best experience!
What are the best spices to add to the Classic Crispy Buttermilk Fried Chicken spice blend for a Southern fried chicken flavor?
Our base blend is awesome, but for that extra Southern flair, consider adding a pinch of cayenne pepper for a little kick, some dried thyme, or even a touch of smoked paprika. Some folks love a little garlic salt or onion salt in their flour mix too. Just play around and see what you love!
Can I bake or air fry this Classic Crispy Buttermilk Fried Chicken instead of deep frying?
While you absolutely *can* bake or air fry it, it won’t quite have that same signature deep-fried crispiness. The double coating and deep-frying method are really what give this chicken its iconic crunchy texture. If you do bake or air fry, you might want to adjust the flour mixture a bit and keep a close watch to get it as golden as possible!
Nutritional Information for Classic Crispy Buttermilk Fried Chicken
Just a heads-up, the nutritional values for this Classic Crispy Buttermilk Fried Chicken are estimates. They can really vary depending on the exact cut of chicken you use, how much oil it soaks up during frying, and even the specific brands of ingredients you pick. So, think of these numbers as a helpful guide rather than exact science!
Storage and Reheating Classic Crispy Buttermilk Fried Chicken
Got some delicious Classic Crispy Buttermilk Fried Chicken leftovers? Lucky you! The trick is to store and reheat it in a way that keeps that amazing crunch alive. Nobody wants soggy fried chicken, right?
Storing Leftovers
Once your chicken has cooled down completely, pack it into an airtight container. You can line it with a paper towel to help absorb any extra moisture. It’s best to eat it within 3-4 days for the freshest taste and texture.
Reheating for Best Results
Okay, here’s how to bring that crispy magic back. The oven or an air fryer are your best friends for reheating fried chicken. Skip the microwave if you want it crispy!
| Method | Instructions |
|---|---|
| Oven | Preheat your oven to 375°F (190°C). Arrange the chicken pieces on a wire rack set over a baking sheet and bake for about 10-15 minutes, or until heated through and nicely crisped up again. |
| Air Fryer | Pop the chicken into your air fryer basket in a single layer. Air fry at around 350°F (175°C) for about 5-8 minutes, flipping halfway, until it’s hot and crispy again. |
For more delicious recipes and inspiration, check out our Pinterest page!
Print
Classic Crispy Buttermilk Fried Chicken: 3 Juicy Secrets
- Total Time: 4 hours 35 minutes
- Yield: 4–6 servings 1x
- Diet: Vegetarian
Description
A classic recipe for crispy, juicy fried chicken brined in buttermilk for incredible flavor and tenderness. This recipe uses a double coating method for an extra crunchy crust.
Ingredients
- 3–4 pounds bone-in, skin-on chicken thighs and drumsticks
- 2 cups buttermilk
- 1 teaspoon salt (for marinade)
- 1 tablespoon paprika
- 1 teaspoon garlic powder
- 1 teaspoon onion powder
- 1 teaspoon salt
- 1/2 teaspoon black pepper
- 2 cups all-purpose flour
- Vegetable oil for deep frying
- Optional: cayenne pepper or hot sauce for spicy variation
- Optional: 1 tablespoon fresh or dried herbs (thyme, oregano, rosemary)
Instructions
- Combine buttermilk with 1 teaspoon salt and optional spices. Soak chicken in this mixture for at least 4 hours or overnight.
- In a large bowl, mix flour with paprika, garlic powder, onion powder, 1 teaspoon salt, black pepper, and optional herbs.
- Remove chicken from buttermilk, letting excess drip off. Coat each piece thoroughly with the seasoned flour. For extra crispiness, dip briefly back into buttermilk, then dredge again in flour. Shake off excess.
- Heat vegetable oil in a deep skillet or fryer to 350°F (175°C). Carefully add chicken pieces, avoid overcrowding. Fry for 12-15 minutes, turning occasionally, until golden brown and the internal temperature reaches 165°F (74°C).
- Remove chicken from oil and place on a wire rack or paper towels to drain excess oil. Let rest for a few minutes before serving.
Notes
- For a gluten-free option, use a gluten-free flour blend in place of all-purpose flour.
- Ensure the oil temperature remains consistent for best results.
- Resting the chicken after frying allows the juices to redistribute, resulting in a more succulent piece of chicken.
- Prep Time: 20 minutes
- Cook Time: 15 minutes
- Category: Main Course
- Method: Deep Frying
- Cuisine: American
Nutrition
- Serving Size: 1 piece
- Calories: Approximately 500-600 (varies by cut and amount of oil absorbed)
- Sugar: Low
- Sodium: Moderate
- Fat: High
- Saturated Fat: High
- Unsaturated Fat: Moderate
- Trans Fat: Low
- Carbohydrates: Moderate
- Fiber: Low
- Protein: High
- Cholesterol: High